What;s Happening Wednesday-Shop til Ya Drop

What's Happening this Wednesday is that I am preparing for the upcoming Christmas holiday! Business wise I am creating gift sets in these cute boxes for the Christmas cabin, as well as special orders.
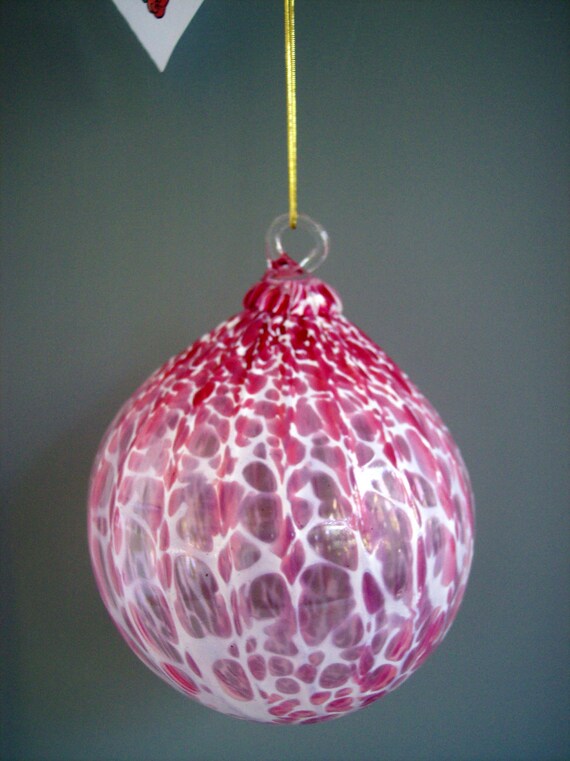
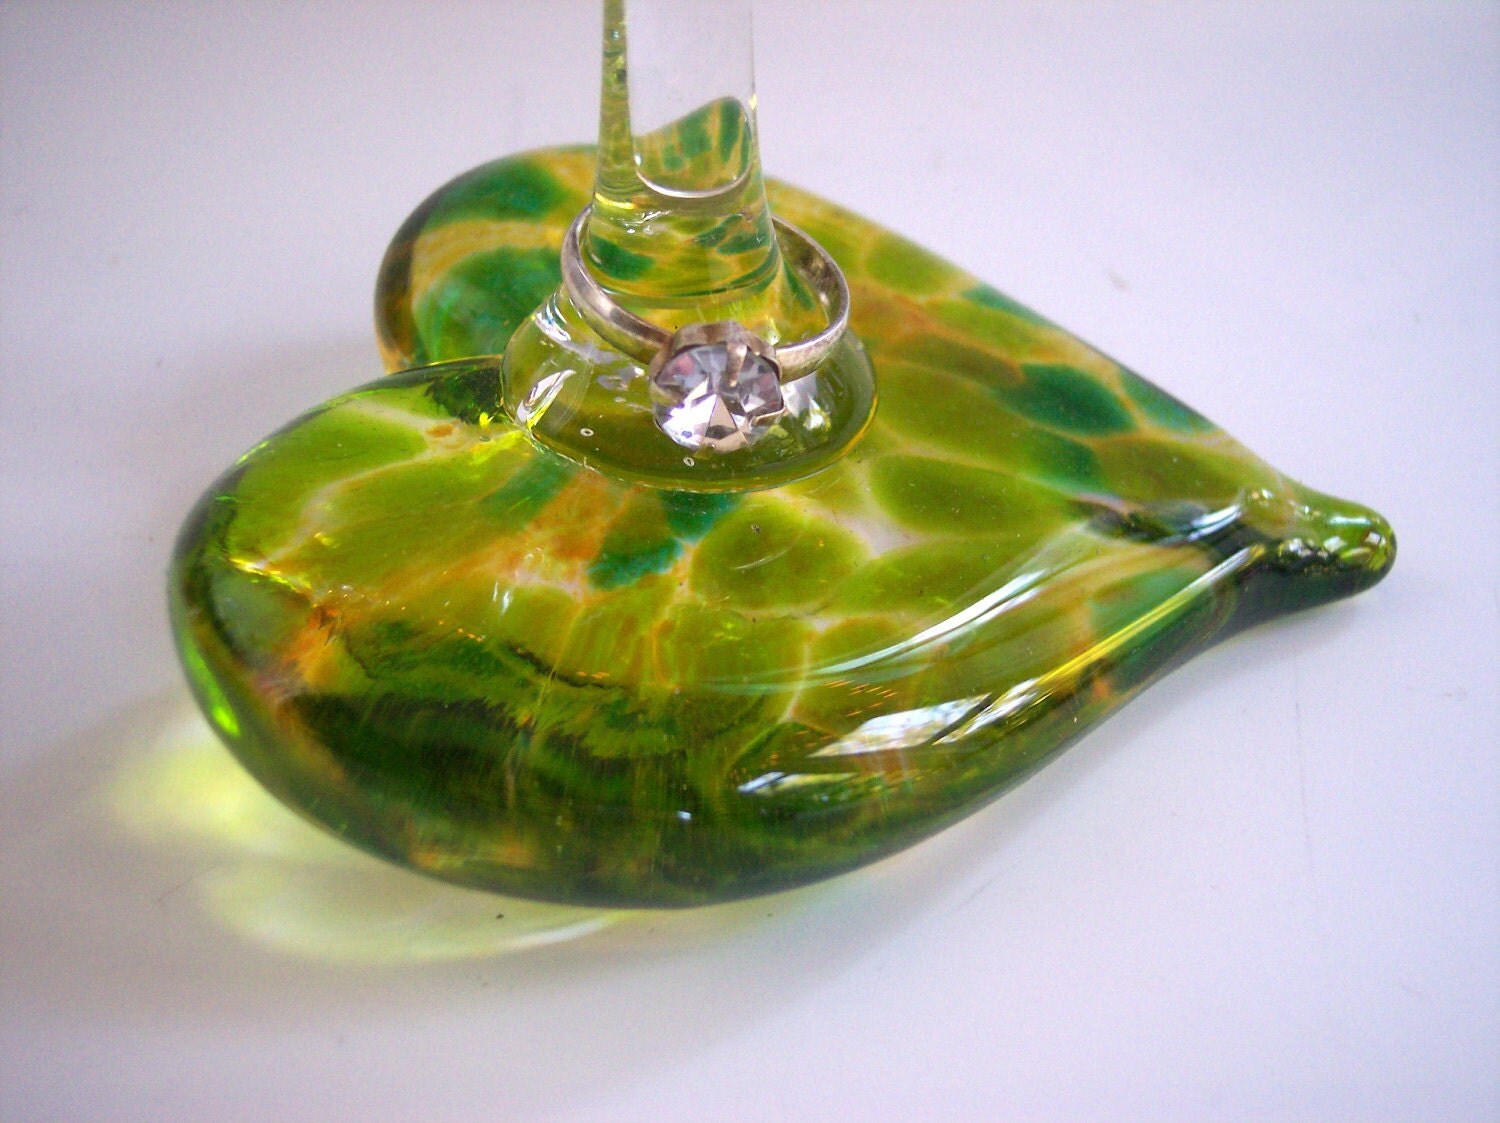
This one matches my new labels, so I am quite excited by them. The large one is very heavy and very large! 


This one was a special purchase so when they are gone, they are gone.

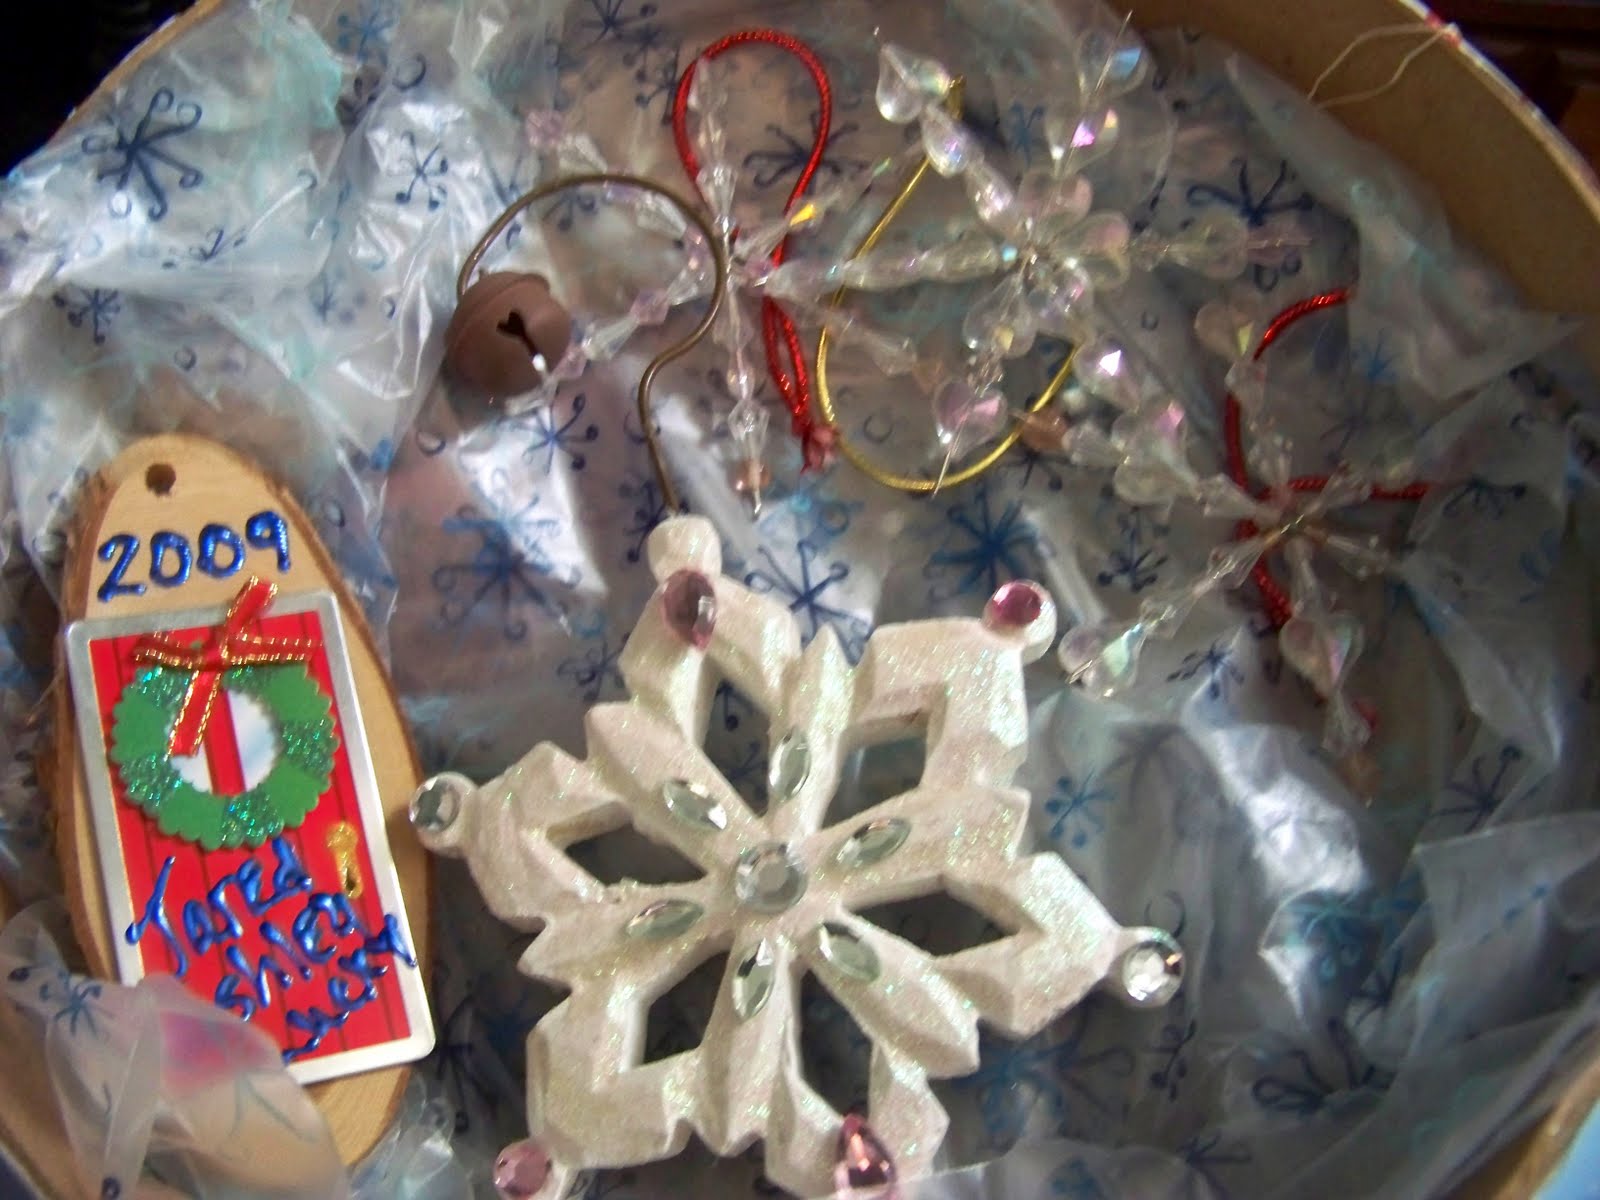
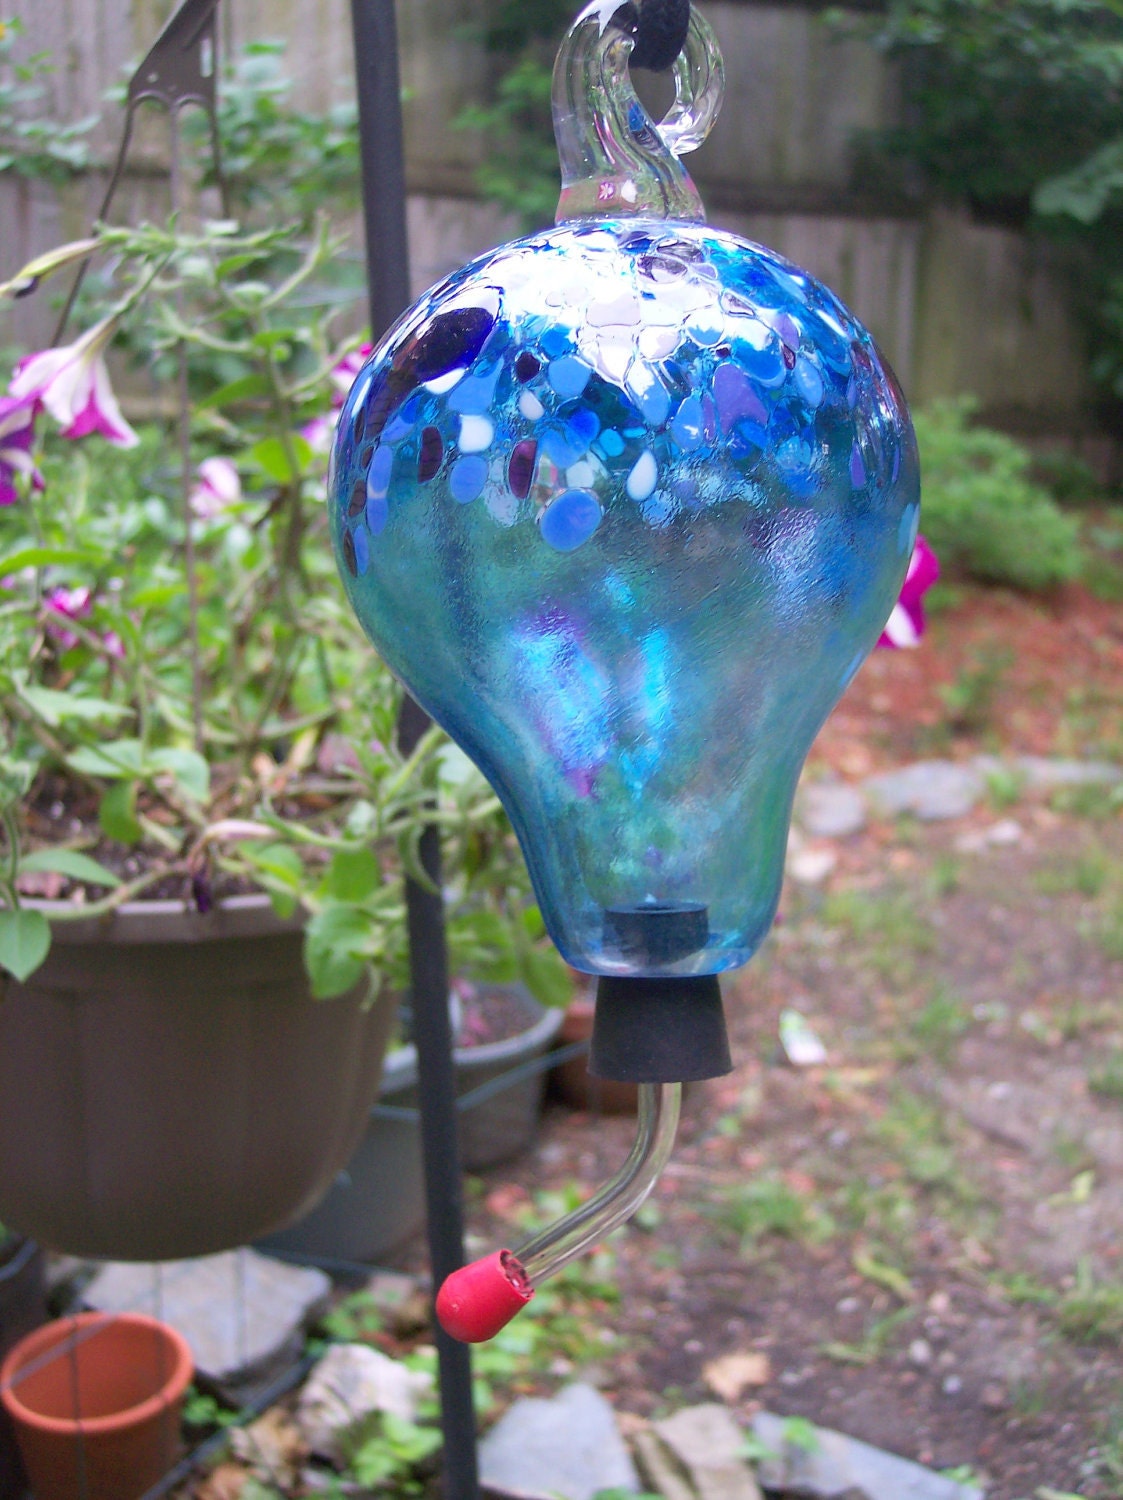
This set is also a special purchase, and may be                               sold as a tower of gifts or individually. 


I am also finishing up some ornaments that are being made for personal gifts, as well as preparing to make a batch of liquid soap this week. Look for ornament pictures on tomorrow's Tripod Thursday post! 


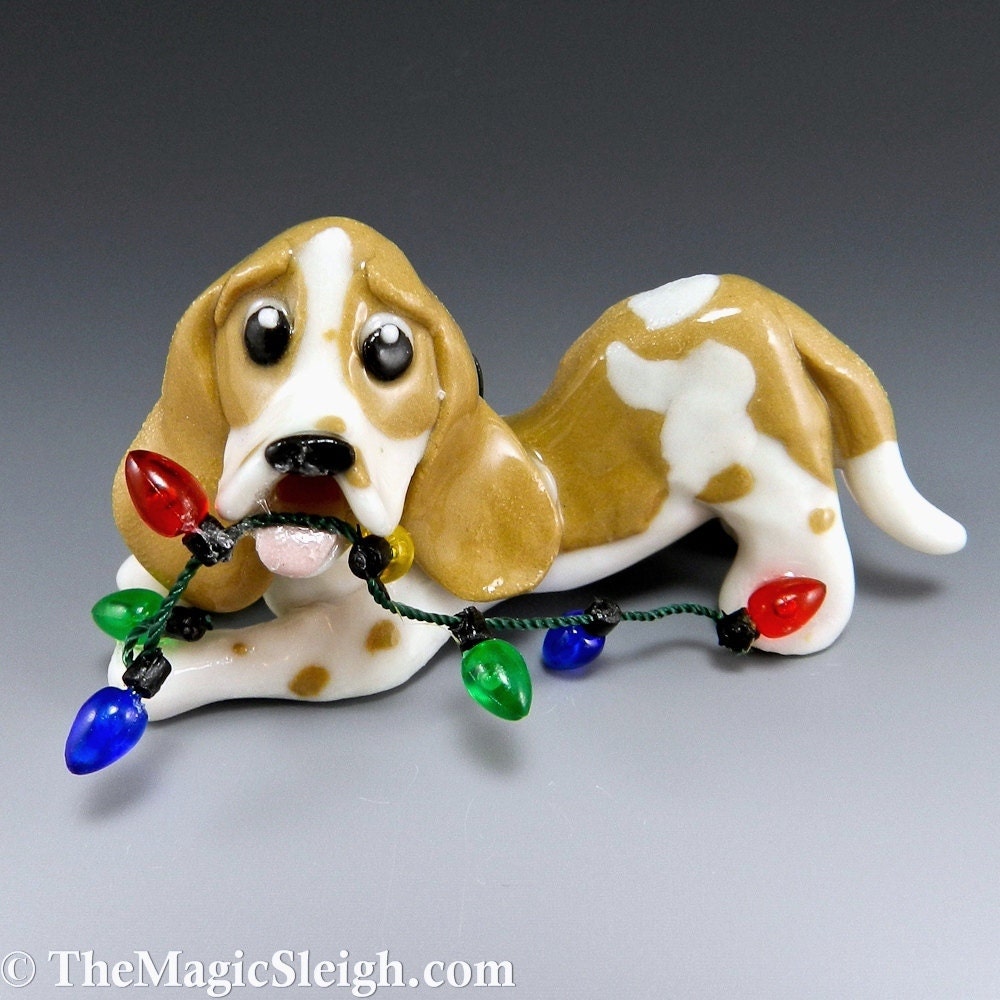
Given that there are only 24 more shopping days until Christmas, I am going to step up my Indie shop postings. So today's shop is a really unique and cool Etsy shop. It is called The Magic Sleigh and you will find the cutest little porcelain dog statues there. Yes, they are handmade and just the sweetest little things you can imagine! But why imagine, go there and look! The owner and Artisan, Pamela, has  the dogs arranged alphabetically, and is currently sporting a whopping 329 statues in her inventory. She lives in Florida, so these are all made in the USA, and at just under twenty bucks,  they won't kill your pocket book either. These will make an excellent gift for all the dog lovers on your list, not to mention the all the hard to buy for's. Lol. She also makes many with angel wings and/or halos, so you can pay tribute to a lost friend as well. All in all, this looks like a wonderful place to shop!             

Teaching Tuesday-Gifts/Ornaments

With Christmas around the corner you may be trying to figure out just how you can stretch your dollars, while purchasing treasured gifts for the season. While I am not an extreme couponer by any means, I certainly do qualify as a "value" shopper. I search for great deals, and almost always make purchases when items are on sale. This means that I usually have a Christmas gift box going in the summer, and that I buy winter clothes in the summer and summer clothes in the winter. 


One tradition that I began when my first Son was born, was to purchase an ornament that had something to do with his life that year. Of course I did the same for my second Son as well. Each year, each child was tasked with hanging their ornaments on the tree, and when they set up their own household all of their ornaments were gifted to them. This way they didn't have to worry about purchasing a ton of decorations that first year, and of course they had a pleasant reminder of their childhood too. Not to mention that they had hours of story telling material, explaining the reasoning behind each ornament. Their ornaments continue to bring joy to my Sons, and now I have begun the tradition with my first grandchild. Long after I am gone, these small memory markers will be a part of our family. I am so happy that I began this little tradition!  


One year my money was pretty tight, yet I had a few co-workers that I really wanted to give a little something to. I was becoming very frustrated in the gift search, when I began unpacking the decorations box, and came across the kid's ornaments. Then it finally hit me. Ornaments are not that expensive, yet they are pretty, bring joy, and are an annual reminder of the giver. From that year on, money or none, to the delight of my friends, I have given the gift of ornaments. So, if you are looking for a memorable, yet inexpensive gift, try an ornament. Of course ornaments have gone up in pricing over the years, but if you want to make it really special, why not try making it yourself? Not only does this keep the cost down,  but it really can be quite easy.  


Aside from these clay ornaments, you can purchase plain glass ornaments at your local hobby store, or even the dollar store. You can paint those, mod podge a picture on it, glue beads or jewels on it, fill the inside with snow, glue leaves and berries on the outside, or even put decorations down inside the bulbs. You can paint scenes on the outside of the bulb or just write a name and the year on them in puff paint. 


Not into the glass? Check your local hobby store for cardboard ornament forms. They have them in all shapes and sizes, ovals, square boxes, and different buildings. They come plain, and you just have to paint and decorate them. Or, in the same vain, you can find various ceramic shapes, from mini plates to snowmen. Again, you just need to decorate them however you want. The possibilities are endless, and only limited by your imagination!


These projects are very easy on your pocketbook, and at the same time, it will mean a lot that you took the time to create the perfect gift. Want to make it extra special? While you are at the hobby shop, pick out a cardboard gift box and decorate that box (try purchasing some holiday scrap book paper and use mod podge to decopodge the box. Then place your ornaments inside the box, tag it  and wrap a bow on it, and whalla, the perfect gift, wrapped perfectly, and ready for after holiday storage!) 


This was from a box of blue bulbs I purchased on sale after Christmas one year. I glued crystal gems on it and used the sparkling silver puff paints to paint decorations on it. 
This has "iced" branches stuck inside it. It is really beautiful in person, and this simple decoration has received many compliments!

This one has the shiny package wrap stiffed in it, along with candy. Then the outside has "Tis the season for candy" written on the outside

This was a wood cut out that I just painted and decorated.

This is a decorated gift box, filled with ornaments. the piece of wood on the left with the door on it, signified that Son's first non-college home of his own. Then the rest were all some type of snow flake. there were beaded ones, wood ones, crystal ones, and glass. Oh, and yes, the box was decopodged! 

Fake snow, berries, and pine branches make this bulb unique

bejeweled and glittered, make any ornament sparkle and shine! 

Make it Yourself Monday-Moisturizer

I hope that you all had a wonderful holiday and have many new things to be thankful for! I actually had two Thanksgiving dinners, one being last night, so I am doubly, if not extremely thankful! 


Before getting into today's Make it Yourself recipe, in honor of cyber Monday, anyone wishing to make a purchase from Unique Garden Essences will receive a discount of 5% under 20$, 
10% 21$ to 45$, 
20% 46$ to 74$ and 
25% over 75$
Please remember that I have over 70 different batches of soap at this time. Most of which are NOT listed in the Etsy shop. For the majority of them, please look at this post. [To that list you can add; Sugared chestnuts, Frosted Winterberry, Mistletoe Whispers, and Oak Barrel Cider. There may be others, so ask if you don't see a favorite of yours and I will let you know if I have it or if I will have it (ready) soon.]  I also have the lotion bars and lip balm that are mentioned in that post, so listed or not, let me know if you are interested in those items. I will then email you back the available weights and costs of what you are interested in. 


I have some wonderful (cute too!) gift boxes that I will happily make up with your choice of contents. For this sale day, I will make the gift box my gift to you! Just tell me, in the notes to seller box, if you specifically want a holiday themed box (I have a reindeer one), or if you want the garden themed box (I have a few different ones, so I will choose one for you!). They are all very cute and definitely worthy of your gift giving. After the sale, these box sets will add an additional $3 to 10$ to your gift sets, so take advantage of this offer today and mark another name off your gift list!  *If you would like your items neatly packed in the gift box, you must make a note in the notes to seller box. If you fail to, I will not include the box, nor will you get one at a later date. If you want one, but have no preference as to the type, just write yes I want a box, and I will choose for you. Each gift box will will include a gift card for you to use when giving your gift. If you would like a gift card, but no gift box, let me know and I will enclose one!


For the 'fine print". These offers are good until 12 pm est (in the USA), Tuesday, November 29, 2011. Shipping is not used to calculate the discount, only your actual purchase(s). To receive the discount, all you need to do is to write "cyber day" in the notes to seller section. When paying through pay pal, You will pay the full price, then you will be refunded when your order is processed. Refunds will be processed within 48 hours maximum. As always, if your shipping is overestimated and overcharged by more than one dollar, the difference will be refunded as soon as your package is on its way! 


Now, on to today's recipe. While we always need a good moisturizer, with winter coming it is even more important. The harsh elements can really play havoc with our skin, especially the tender skin on our faces. So make sure that you take good care of it and protect ot from the elements. You will be glad you did! To that end, here is an easy recipe that will make you a great moisturizer. It does have a few more "specialty" ingredients than I usually like to include in these make it yourself recipes, but this one is worth it! You can find the aloe, the beeswax and the lanolin locally or on line. If you want to shop on line, you will find all that you need at one of my favorites, Brambleberry .


Aloe and Rosewater Moisturizer
You will need;
1/2 cup of olive oil (yes your kitchen stock will do just fine)
2 Tablespoons aloe vera gel
3 Tablespoons grated bees wax 
3 Tablespoons lanolin
4 Tablespoons of rose water *see below to make your own


Blend the olive oil and the the aloe together in a small bowl and set it aside. Then, in a small sauce pan, melt the beeswax and the lanolin over a low heat. Make sure to stir constantly. When fully melted, remove it from the heat and gradually pour in the aloe and olive oil mixture, making sure to continue stirring. When fully mixed in, add the rose water and pour it all into a blender. Blend until the mixture is exceptionally smooth., then pour into a jar and place in the refrigerator. It will solidify as it cools.


This lotion will make your skin soft and supple. And, as a bonus, the rosewater not only has toning qualities, but also anti-inflammatory and antiseptic properties.


*To save yourself some money, you can make your own rose water fairly easily. All you need to do is to bring one cup of distilled water to a boil, then pour it over one cup of fresh rose petals (make sure that you use roses that are not treated with pesticides or color enhancing chemicals). Allow this to steep for 30 minutes, then strain it, reserving the water and trashing the plant material. Store any unused rose water in the refrigerator (it makes a great daily facial astringent or a nice addition to your bath water!).

What's Happening Wednesday-Thanksgiving

This Wednesday, what is happening in my household is most likely the exact same thing that is happening in most households, Thanksgiving preparations. As you prepare your meal, or just prepare to eat if you are like some of us....not mentioning any names, my children, (Lol) I would like to encourage you to use this family time to not only reminisce about what you are thankful for, but to actively seek ways that you can make a difference this year and in years to come. My Mom has always borrowed a saying from her friend, Many hands make light work. Well I say that we are a community of many hands, so if we each pitch in, we can effect big changes with light work. So I challenge you to figure out how you and yours can create change this year, how you can make a difference. What about making and delivering a meal to a shut in once a week, or even once a month? Or maybe sitting down and sharing a half hour of your time just visiting? What about shopping for an elderly neighbor while you do your own grocery shopping? In all the above instances, a mere thirty minutes would make a large difference in someone's life. While Thanksgiving and Christmas are a wondrous time of year, where we often think about giving of ourselves, needs go on all year long. I ask you to consider what you can do all year, this year! 


The other big thing, besides food preparation for Thanksgiving, is of course the black Friday shopping plans. Hard core shoppers, not that I would know about this....but I am ummm, told, yep told (that's my story and I am sticking to it!) that they use this day to map a shopping route and plan the purchases from each store. While I am certainly one for a deal, and believe me, I do know that we need to be savvy with the little money that we have, I am also one for community support. So I am advocating that we all limit our purchases from the chain shops, and make the bulk of our purchases from local handmade businesses, and the small business owners in your town. I truly hope that each of you will consider doing this.  By backing your on line Indie and local merchants, you will be reducing your carbon footprint while boosting local commerce, as well as your country's economy. Seems to me this is a win-win-win. Good for the businesses, great for my pocketbook, and wonderful for the gift recipients! 


Whatever you eat, wherever you eat it, may your Thanksgiving be full of love, and blessed with friends and family. And if you are away from your friends and family, please go to your local community center or church, and share a meal as you make new friends! Food always tastes better when it's shared! 


When you're done shopping on Friday, please come back here and check out some new photographs!

Teaching Tuesday-Star Anise, not Aniseed

Earlier this year we spent a Teaching Tuesday on Aniseed essential oil. While I did point out that aniseed is not the same thing as star anise, also called star aniseed to further confuse the issue, I didn't really discuss star anise in detail. So today's post is all about star anise!  To review about aniseed, see this post.
You may recall that star anise and aniseed, sometimes called just plain anise, are not closely related, botanically speaking, although they are both part of the magnolia classification. Star anise is the fruit of Illicium verum, an evergreen magnolia, native to China (but also cultivated in India, Japan, the Philippines, and even the eastern USA), while aniseed is the seed of Pimpinella anisum, which is native to the eastern Mediterranean. Additionally, they both contain a certain amount of anethole, which is the chemical compound that is responsible for creating the licorice like scent and taste, and the anethole in the oils is what makes these oils crystallize at cool temperatures. As for taste, both are rather fresh, sweet and spicy, and as already mentioned, licorice like, but the star anise has a stronger, more pungent taste than the aniseed. 


Interestingly, the Illicium verum tree doesn't bear fruit until its sixth year, but once it does, it can continue to bear fruit for up to a century. The fruit is picked while still unripe, and then dried in the sun. The fruit is quite distinctive in its look, having eight canoe-shaped carpels on each fruit. (Sometimes you can find a pod with six or twelve carpels, but these are kind of like four-leaf clovers). In fact, the Chinese names for star anise (ba jiao, in Mandarin, and bat gok, in Cantonese) translate as "eight corners" in English.


Of course, one of the main uses of star anise is as a cooking spice, and as such, is one of the major components of the Chinese five spice powder. The five spice powder is comprised of clove, fennel, cinnamon or cassia, and  Szechuan pepper, in addition to the star anise, and this blend is the only common spice blend in Chinese cookery.  Star anise is a large part of of Chinese red cooking. This is where the meat is turned a deep reddish brown color as a result of braising in a dark soy broth. Of course star anise is also used to spice risottos, deserts, teas, and soups, as well as meat dishes. In Western cooking, star anise is primarily used in cake recipes and the poaching liquids for fruits, as well as some flavorful drinks.
Most of the time the star anise is added into recipes whole, steeped in the liquids and removed before eating. When the recipe calls for ground star anise (which is usually just in baking recipes), you need to remember that it is a potent spice, so it's best to grind it yourself and use small amounts at a time, until you reach the taste you desire. Do remember though, that, as with most spices, once you grind it the potency will begin to degrade immediately, so only grind what you need and store the rest in a glass jar with a tight-fitting lid. The star anise will keep in your pantry for two years and is fairly inexpensive if you buy it in an Asian market. They sell it in clear bags, for under four dollars a pound. And when you open it, don't worry if you find a lot of seeds out of the pods. The pod is actually more aromatic and more flavorful than the seeds. It is the pods, which are called schizocarps, that you will use. 
Aside from its culinary uses, star anise is also used for healing and in some spiritual rituals. It is said to enhance psychic powers and bring good luck as well. It is even supposed to protect against the dreaded Evil Eye. 


In fact, laboratory studies prove that Star anise possesses antimicrobial, antibacterial, antioxidant, insecticidal, analgesic, sedative, and convulsive properties. Drunk in a tea, it is a popular rheumatism remedy, and the chewing of its seeds after meals is said to aide in digestion.  In fact, star anise is a major source of shikimic acid, which is a primary ingredient in the anti-influenza drug, Tamiflu.


As an interesting side note; in 2005 there was a [temporary] shortage of star anise, due to the making of the drug Tamiflu. Later that year they found a way to synthetically produce the shikimic acid needed for the tamiflu. The swine flu outbreak in 2009 led to another series of shortages as the tamiflu stocks were built up around the world. This sent the prices of star anise soaring sky high. Eventually it did drop back down, and in fact, it remains fairly low, and is a less expensive alternative to the higher priced anise seed. 


There is also a Japanese star anise, Illicium anisatum, which is a similar tree, but bears an inedible fruit. Its fruit contains sikimitoxin, which is highly toxic when ingested. There has been documented cases of Ingestion of this species of anise [in tea], which has caused serious neurological issues (ie. seizures), as well as severe inflammation of the kidneys, urinary tract and digestive organs. So care must be taken to choose the correct anise. This anise is generally burned as incense in Japan


Make it Yourself Monday- Foot Scrub

Here is another wonderfully unique gift that you can easily make for a Christmas gift. It is a foot rub.  One of those things that you rarely buy for yourself, but are so nice to pamper yourself with when you get one! 

You will need;
3 ounces of Sea Salts, (preferably Dead Sea salts, but European or dendritic will work as well- fine or medium grained)
1 ounce jojoba oil
1 ounce sweet almond oil
1/8 teaspoon vitamin E oil
2 Tablespoon jojoba beads (optional)
and your container of choice (I like a nice colored jar, because tins usually rust with just a little bit of time)
2 drops peppermint essential oil*
2 drops lavender essential oil*
1 pod vanilla bean, cleaned out and then chopped (optional) 
*or other essential oil blend of choice


Simply mix everything together and place into your container of choice. This gift would be great in a set. Just combine one of the foot soaks, this rub, and a nice lotion or balm (Brambleberry has a nice recipe here), and you have the perfect foot care gift set! Make sure to include a nice instruction card along with it, explaining that you soak, then use this rub to exfoliate (just take a hand full of the salt mixture and rub it on your feet, not forgetting the ankles, in a circular motion, starting at the top and working down toward the toes. Be sure to apply a gentle, even pressure. When finished, rinse with warm water, pat dry, then moisturize with the lotion or balm. You could even include some tips from this post on exfoliating! 


There you have it, a useful AND thoughtful gift, handmade by you! What could be better?


Franley Speaking Friday- Shop til ya Drop!

Here we are at Friday again, and as promised, here is another unique store front to check out for your shopping needs, and maybe even some holiday gift-giving ideas. I found this shop on Etsy about three years ago, when it was brought to my attention during a team meeting on charitable giving. ZaVi Baby
is a gift line of women and children's clothing (hand made, of course), but what drew me there was the chemo caps that Tara, the owner, makes for those in need. These hats are very cute and even reversible! And She only charges shipping, plus the twenty cent listing fee. Unfortunately my intended gift recipient passed right after I placed the order, but Tara agreed to gift it to the next person who needed one.  She was so kind when we spoke, it was immediately apparent to me that the caps, and I am sure her clothes too, are stitched together with lots of love.  So, when you are searching for an unique, quality outfit for your God-child, niece, or  your own child, make your first stop ZaVi Baby. And if you, or someone you know would benefit from a chemo cap, visit ZaVi Baby to check out Tara's little love hugs for your head!

Tripod Thursday-Aquarium Part !!

Due to a medical emergency Teaching Tuesday and What's Up Wednesday were skipped this week. I apologize for this inconvenience, but hope that you will enjoy the second half of the aquarium photographs. At this point I hope that I will be able to post tomorrow as well, and then be all rested and renewed for next week. Thank you for your understanding.

Make it Yourself Monday- Bath Salt Gifts

My Daughter in law is already marking her "Days til Christmas" calendar (and I believe there are now 41 more days until!) so I know that it is just around the corner, whether I am ready or not! So here are is quick and easy gift idea. Bath Salts!

You can easily make up a pretty jar of bath salts for anyone on your gift list. You can purchase some epsom salts at your local drug store, to use alone or to mix in with some European or Dead Sea Salts. The Dead Sea Salts are the most expensive salts, so if you are looking to keep the cost down, stick to mixing the Dendrick or the European Salts with the Epsoms. To refresh your memory about the various types of salt available, look back over this old post. Once you have your salts, decide if you want to add scent or not and find some pretty jars and maybe some ribbon, then you will be all set!

Here are some recipes for you to consider, but you don't really need one, let your imagination and your nose be your guide! Just remember that you will only use 5 drops (maximum) of essential oil(s) in 2 cups of salts, and make sure that you don't use essential oils that tend to irritate, such as cinnamon. And, if you use food coloring, it is best to spread out the salts on a tray and allow them to dry before packaging them.

-Candy Canes are a must at Christmas, so why not give yours in a pretty bath salt?  All you need is some peppermint essential oil, red food coloring, whatever type of salts you choose, and a clear jar. Mix 4-5 drops of the essential oil in 3 cups of salts. It is best to put it into a container with a lid and shake, shake shake! Then take out 1/2 of the salts to keep white. Put 1 drop of red food coloring into the other half, replace the lid and shake, shake, shake some more. If you think the coloring is too light, you can probably add 1 more drop of coloring. Just be cautious. You will NOT get a deep red, as too much food coloring will stain the tub and can even stain the person! Leave the salt sit for a while so that it absorbs the scent and the color dries, then layer the colored salt with the plain salt until the jars are full. This makes such a beautiful display, and a very lovely gift!

-Try mixing 4 drops of lavender and 5 drops of eucalyptus essential oils in 3 cups of salts, for a nice, soothing and uplifting blend. You can add a drop of blue food coloring if you so choose.

-How about a lime and basil bath? Mix 5 cups of the salts of your choice with 5 drops of lime and 4 drops of basil essential oils. For a pretty presentation, add 1 drop of green food coloring and 1 drop of yellow food coloring to the entire mix, or double the recipe and color half, then layer or play with skewers and design like it is sand art! Want to get really fancy? Add some crushed (dried) basil.

*For an extra special presentation you can purchase jars that have cork stoppers. Then dip the cork into a colored, melted wax, then place into the bottle for a great seal and a cool look. Try green with the basil and lime bath, and red with the candy cane. Let your imagination run wild, and seal all your jars!

-Tie a ribbon or raffia around the jar lid to spruce it up a bit! You can even make a pretty gift tag to attach your holiday sentiments!

*You can add 1 cup of baking soda and 1/2 cup of citric acid to 2 cups of bath salts to make Fizzing bath salts!

Franley Speaking Friday- Shop til ya Drop!

It's Friday, and that means another installment of the Shopping review. Last week we found Pigatopia, where artist extraordinare, Shannon, recreates your beloved pets and family members on canvas, making a purchase from Pigatopia a truly unique gift.

Today's shop is also found on Etsy, and is also quite unique. Are you sensing a theme here for your holiday shopping? Lol. The Providence Art Glass company features hand blown glass by artists Rebecca Zhukov. You can read more about her here, and just wait until you see see who already owns some of her work!

When I visited Canada a several years ago I came upon what was called a "Witches Ball". It was a beautiful, hand blown orb, Christmas ornament style. But the witches ball doesnt get put away after the holidays, it stays out all year long. I even purchased a special stand for it to hang from. Why am I mentioning my nick knack? Well, there are a lot of these types of balls in the Providence shop, lovely, colorful orbs that are certainly worthy of being left out all year long, she just doesnt call them witches balls! Ornament, orb, ball, witches ball, whatever you call them, check them out for yourself!

Orbs not your deal? Well, dont despair, she has a number of other items to choose from!  There are lotion dispensers, glasses, ring holders, humming bird feeders, vases, vanity sets, sculptures and more! Feel free to contact the Artist through her Etsy link to discuss any special requests you may have. Hand blown glass, a one of a kind, truly unique gift that anyone on your list would be happy to receive!

Tripod Thursday-Woods

Unfortunately I was ill during the best two weeks of the Fall color change, but I did manage to snap a few interesting pictures on my way back from the Christmas at the Cabin earlier this week. I hope that you enjoy!

What;s Happening Wednesday-Risotto

Oh my, I made my test batch of risotto yesterday and it was something else! I did a butternut squash, morel mushroom, spinach, and feta cheese risotto. Of course it also had sauteed [fresh] garlic and sweet onions as well, and as far as I am concerned, it was a hit. I am definitely making it again for our Thanksgiving slash Mom's birthday dinner. And I can't wait to get in the brulee torch and try the pumpkin brulee recipe!

So, lets get back to this risotto.  I had never made risotto before last night, in fact I had only eaten it once. That risotto was quite flavorful and just plain awesome. It was in an Italian restaurant at the Newport Levee (Newport, KY) and I fell in love. It had pine nuts, pumpkin, and chicken, and was to die for. So I began checking out recipes and hunting for ingredients to give this a whirl myself. Other than the fact that you have to stand and stir a LOT, it really isn't that difficult. I will say though, you really don't need as much as they say for a serving. I made a "4" serving risotto for two of us, expecting we would have a small amount of left overs. Well, we had a huge bowl of left overs! Mine did take longer to cook than the recipe stated, and I used more liquid than the original recipe too. I also substituted a butternut squash for roasted pumpkin, and added some lovely morel mushrooms as well. While I served mine with grilled (marinated, and oh so tender) pork chops, I would have been happy to eat the risotto as the main course. While I did change a few things in the basic recipe, the next time I will change a few more.

To begin with, I split the squash in half, took out the seeds, lightly oiled the top, and seasoned it with salt and pepper. I then laid it face down in a pan and baked it at 400 degrees for about 18 minutes. This gave me squash that was almost completely done, but still a tad hard. I just didnt want it all mushy. While this was cooking, I began by sauteing diced (fresh) garlic and a diced sweet onion. Next time, for a serving of four, I will use two (medium) onions and two garlic cloves. Once these were soft in the pan, I added 2 cups arborio rice and stirred for about two minutes, then I began adding liquid. I read that you need to add liquid slowly,m only adding more in once the first added is absorbed into the rice. Meanwhile, you must keep stirring. You continue to stir and add liquid until the rice is done. The original recipe I drew my inspiration from called for 4 cups of vegetable stock. I began with 3 cups of chicken stalk and 1 cup of white cooking wine. By the time it was all said and done, I had used 17 ounces of wine and about 5 cups of the chicken stock. Of course I also stirred my arm off, but I guess that is to be expected from what I hear. When the rice was almost tender, I took the cooked squash and mashed half of it, and cubed the other half. I also put the feta cheese on a tray and placed it it in the oven until it began to melt. While the recipe called for 6 ounces of feta cheese, I found that to be too overwhelming, and ended up removing some from the top. So I would recommend cutting the feta to about 4 ounces. You can always add more, but getting it out isn't always easy! Anyway, next I added about 6 sliced baby morel mushrooms to the pan. When the rice was cooked, I added the mashed squash, about one cup of frozen spinach that had just been thawed and drained, and half of the feta cheese to the pan. Stirred. then filled serving bowls and placed some diced squash on top, as well as the rest of the feta cheese. And whalla, it was time to eat! Yum Yum! Now I have to tell you that I have read that risotto should not be saved and reheated, but there was no way I was throwing out so much food. So I covered some with a paper towel after I sprinkles a few flecks of water on it, and used the microwave to reheat. While the texture was slightly more mushy than last night, the taste was actually better, more infused. I didnt mind it at all, so I will be nuking more in the future!

Teaching Tuesday-Scrub a Dub, Why its Important

We all know that the key to good skin health and beauty is a good care regimin, but do you know what all those steps should include? In case you don't, or if you forgot, they are; To Cleanse, steam/mask/peel to deep cleanse and exfoliate, tone, and then to condition/moisturize. This old post goes into further detail on the steps, but for today I want to look closer at the exfoliation part. This goes for the face as well as the body, but you must be more cautious with the face. This post is geared more toward the body. We need to exfoliate the body daily in order to promote good skin care.

Exfoliation is an extremely important part of the skin care regimen. While the techniques may vary, the purpose for exfoliation remains the same. To begin with, the process rids the skin's surface of dirt and oil reside, as well as rubbing off the outermost layer of dead skin cells. Secondly, it prepares the skin for any subsequent treatments.
The removal of the outer layer of skin cells enables the skin to more effectively absorb and/or react to any products that are utilized in treatments which follow the exfoliation.
Exfoliation helps to stimulate and circulate lymph fluids which, in turn,m aid in the elimination of bodily toxins.
Exfoliation is stimulating massage, and, as such, improves blood circulation.
Exfoliation affects the secretion and production of the body's natural oils. When the natural oils are depressed or clogged, a variety of skin issues arrise.
The entire body should be scrubbed on a daily basis, even if only for 5 minutes.
When scrubbing for the first time, or after a prolonged abscense, it is very important to be gentle on the skin.  Gradually the skin will develop a natural resistance to scrubbing, then more vigourous scrubbing can take place, with more pressure being applied.
Be sure to have the proper tools. For the body, which is what we are discussing (not the face), you can use a sisel mitt, a towel, a loofah sponge, a stiff brush, or even just an exfoliating soap. I make two types, one with apricot seeds, and one with sea salts.

To properly exfoliate, use the scrubber in a circular motion. Begin with the feet, ankles and legs, working on to the hands, arms, and shoulders, gradually working your way down the back, then up through the torso toward the heart. The order of exfoliation also aides in proper circulation, so be sure to follow the directions as laid out.

Use a cool water rinse after the body scrub to further promote good blood circulation throught the body. Pat the skin dry, then don't forget to mositurize. This treatments is best performed as part of your morning ritual since it is very invigorating and energizing, and it's rejuvinating too!

Make it Yourself Monday- Pumpkin Brulee

In keeping with the holiday season, this week I am offering another food recipe. I just found this one (a video on recipes.com), and actually will be making it for my Mother's birthday dinner, as well as our family Thanksgiving dinner. 


To make it you will need some ramekins, and I just ordered a set, complete with the brulee torch, for twenty bucks from kitchen & company, and their shipping was only $5.50 for priority, so none of the usual "handling" fees! Anyway, if you already have some, great! 


You will need; Preheat oven to 325 degrees F.
3 egg yolks
1/2 cup packed brown sugar
1 cup heavy creme (you can sub a lower fat milk, but it's a holiday, so splurge!)
1 cup pumpkin puree (you can sub butternut squash if you prefer)
1/4 tsp. nutmeg*
1/4 tsp. all spice*
1/4 tsp. cinnamon*
1/8 tsp ginger+
pinch of salt
*You can add 1/2 tsp. of these to spices if you want to make it more spicy
+ You can add up to 1/4 tsp. of this spice if you want to make it more spicey


Simply mix the egg yolks with the brown sugar, then add in the heavy creme and mix for about two minutes. Then add in the pumpkin puree and the spices. When it is well mixed, fill the ramekins until they are about 1/2" from the top. Then place the ramekins in a baking pan (best to use something in the bottom to help prevent sliding. You can use a towel or a silicone mat). Then fill the pan with water so that 1/2 of the ramekin in under water. Bake for 30-35 minutes. They are done when a knife/toothpick put into the middle comes out clean. It will still giggle a bit. Place ramekins in the refrigerator for at least a few hours. The brulee must be completely cold before you can finish it. When it is cold, and just before you are ready to serve, remove the ramekins from the fridge and place a good covering of sugar on the top of each, covering the entire surface. You will probably use between one and two teaspoons of sugar, and can use white or brown sugar, but most that I have talked to prefer the white. After you have the sugar sprinkled evenly, use the torch and dissolve the sugar until it is completely dissolved. Spin the dish around so that you can get an even melt, but make sure that you use the bottom half to turn it, or you will burn your fingers!   Once all melted the sugar top will look like glass and will crack when someone goes to eat it. Every creme brulee junkie listens for that sweet sound, let me tell you! It is like Pavlov ringing the bell, it gets your saliva going for sure. While I love creme brulee, I have not ever had pumpkin, and am very anxious to try it. I can't wait until I get my new ramekins and torch! Oh, by the way, you can use the broiler to melt the sugar if you absolutely don't want to buy a culinary torch, but it is a LOT more difficult to manage.

Franley Speaking Friday- Shop til ya Drop!

As promised, today I am beginning my shop reviews. While most shops will be new to me, this first one was chosen because I have shopped there in the past. And I have to say that I remain glad that I did. It is one of the best purchases I have ever made. A couple of years ago I met a woman on Etsy, through an animal group that we both belong to, Etsy for Animals. Her shop name is Pigatopia, and as you may infer, she likes pigs. In fact, she runs a rescue/shelter for pot bellied pigs, and even has some that stay in her home. But that is not the most unique thing about her shop, that is just a side note that I found fascinating. The owner of Pigatopia, Shannon, is an excellent artist, and her favorite subjects are animals! 
Well, my Mother's favorite children are her Yorkie dogs and they can't exactly purchase a gift on their own. Not to mention, she is extremely difficult to buy presents for. So, I commissioned a portrait of her 3 Yorkies, Misty Morning, Twinkling Twilight and Fiesty. I received a wonderful portrait. It was extremely accurate, and before you ask, NO, not all Yorkies look alike! But each dog represented in the painting certainly looked like the real them! And she even added Kiki (the cat I told you about last week, the one that Mom packed off to my house). While Mom loved the painting always, since Misty has now passed away, she really treasures that painting. While the look on her face when she opened it was worth a million dollars, the fact that it continues to hang and bring her joy, well that is a bonus as far as I am concerned! 


Portraits range in price depending on size and type (material), but begin at a very reasonable $30! Here is a sample of her work, this is her puppy, Charlie. The Charlie portrait is $130.


And here is her Mother's day gift to her own Mother, and this portrait type and size would be $32.00. 


Now, Shannon doesn't just do animals, so if you want a human portrait or even one of an old, favorite car, go and visit Pigatopia on Etsy and get in touch with Shannon. Give a gift that they won't be expecting, a gift that will keep on giving, give a portrait of their favorite classic car or their pet, or even a portrait of you! 

Tripod Thursday-Fall in Ohio

Here are some Fall scenery pics from this year, although I was ill during the best part of the color change, these still represent well!


What;s Happening Wednesday-Rant and Shop

Before I get into today's topic, I want comment on something I read today. It was a reference for a "clinical study" that "proves" that a specific brand's essential oil blend prevents the H1`N1 flu. Well I had to go and read that study immediately! What I found was that this particular blend MAY decrease the risk of the influenza virus, not the H1N1 specifically, in canine kidney cells, when used at specific amounts (thousands of parts to one flu cell). While this sounds promising, it was NOT what it was represented to be. When I went to that brand's website I was very disgusted to see some "typical" sales tactics employed. In fact, I was quite infuriated! While I am addressing these topics/points in my upcoming book, I really cannot wait, I feel the need to point out a thing or two right here and now. 

Whenever you see a site that sells "therapeutic grade" and "perfume grade" or any other "grades" of essential oils, RUN away from that site! There is only ONE grade of essential oils! [There is a perfumers quality of scent, but that is not essential oil, it is something different.] If it is an essential oil, then it should be the pure volatile oil of the plant/fruit/shrub/bark/herb, and that can be therapeutic when properly utilized. When a site is selling other "grades", they are adulterating their oil or using adulterated oils, and duping the public. Unless it is adulterated or has been otherwise compromised, essential oils should all be the same. And they should smell similar. However, they are natural products and each harvest will vary slightly, just as oranges from different growing fields, and different harvests will taste slightly different.

While we are at it, there is NO such thing as essential oil of strawberry, essential oil of cucumber or a great number of other so called essential oils. Also, if you can find essential oil of rose (aka rose otto) at 10$ a half ounce, it is FAKE! Some oils are expensive and there is no way around that expense unless you buy an adulterated product. MY best advice to you is to research, and to study or ask someone with more experience and knowledge.  Some essential oils have antiseptic, antiviral, and even antibiotic properties. Therefore, there are some that I have used, and would even recommend for certain minor ailments/conditions. However, I would NEVER recommend an essential oil blend to treat a MERSA infection. In deed, doing so and failing to seek adequate medical attention could be potentially deadly in that situation. But this particular site did just that. I was astonished at their audacity! Please, please never ever replace good, sound, medical attention with unproven claims. And know that just because someone says a study proves that it works, doesnt mean that the study actually proves what they are saying! Many sites bait and switch and confuse and even flat out lie to sell their products. Often mixing in a bit of truth to make it more believable. I do believe in many forms of alternative medicines, but the more serious the ailment, the more likely it is that stronger, more traditional medicines will be needed. Of course the more serious the ailment, the more likely that there will be someone trying to sell you an expensive "cure" too.  Please use common sense, do some research of your own, and only buy from reputable vendors. And most importantly, NEVER, ever, ever sacrifice good, sound, medical attention for an easy, unproven, undocumented, cure all! 

Now that I am climbing down off my soap box, I will get back to today's post! What's happening this Wednesday? Well, I have decided to begin some shop reviews. Christmas is only getting closer every day, and I am WAY behind on my shopping this year. I think this will give me just the excuse I need to explore new sites while allowing me to spend time in unique shops. Hopefully along the way, I'll stumble into one  that excites you! 

This week I will start off by introducing you to a new site instead of a new shop. Poppy Swap   is a new hosting site, a lot like Etsy or Artfire, but also very different. It was opened just a few months ago, but is already growing like a weed. LOL, Little inside joke there, please forgive me. Why? Well, Poppy Swap is actually quite an unique venue. This site only hosts vendors and shops that supply herbal products and herbal remedies. You can find soaps, salves, oils, lotions, and potions, and even raw herbs. [ And yes, of course you will find an Unique Garden Essences store front there, even if I haven't dedicated as much time to it as I should.]  You will find some unique items, from around a hundred unique vendors, even some things that aren't easily found on other sites. So take a few minutes to go and explore this interesting new market place. Then check back here on Friday for the next sweet shopping gem! 

Teaching Tuesday- The Basics of Good Hair Care

Just as there are steps to good skin care, there are also steps to good hair care, but many of us are unaware of this, or simply ignore it. Just as caring for your skin properly affords you great skin, caring for your hair properly will give your hair shine and bounce, and great looking hair always makes you feel good! 


The first step is to condition or moisturize if your hair is normal, or if your hair is damaged, this is the time it is treated. This is considered the "pre-shampoo" stage. After the "pre-shampoo", the next step is the shampoo. As you probably suspect, the shampooing is the cleansing of the hair, the removing of the oil, residue and dirt. The third step is the rinse. The rinse  removes excess shampoo, and replenishes the hair with moisture and nutrients. Then the final step is the conditioning. Conditioning seals the moisture and nutrients into the hair shaft, and protects it from the elements. 

When I first began studying skin care I was not aware of a "pre-shampoo" treatment, or of any special "rinse". When someone spoke about rinsing the hair, I automatically thought of plain old tap water from the shower head. In fact, I was rather amazed to learn about these steps and their importance. If it's new to you as well, I hope that enjoy learning something new. And if it is old news to you, maybe a recipe will be new, or maybe an old recipe will serve to remind you.


Here are some hair care facts and tips. Following the tips are recipes. Enjoy!


-As with every other section of skin health that I have written about, maintaining adequate hydration is important to the health of the hair. Moreover, your general health and nutrition will impact hair health. If you are healthy inside, it will reflect on the outside. So eat well, drink plenty of fluids, and get plenty of exercise and sleep. Avoid alcohol, tobacco and over exposure to the elements.


-Hair grows about 1/2 inch per month, but it tends to grow faster in warm weather than in cold.


-Avoid shampoos with detergent bases, as they tend to dry out and damage the hair.


-Natural ingredients are generally safe and gentle for all types of hair, including color treated hair.


-Hair should be protected from the sun just like the skin. Hats are sunscreen for hair!


-The scalp is more receptive to treatment when the pores are dilated and the skin is relaxed.


-For an all over spa treatment, apply a hair treatment before you get into an essential oil infused bath. That way you can be soaking as your hair is being treated.


-Do not overuse gels, mousses, or hairsprays. They can build up, leave heavy residue and irritate the scalp.


-Use a wide-toothed comb instead of a hairbrush on your hair, as the brushes bristles tend to damage the hair shafts, causing breakage.


-When you rinse your hair, use cool water for the final rinse. This will tighten your scalp pores and leave your hair shinier.

RECIPES


PRE-SHAMPOO SAGE CONDITIONER Recipe - This one is especially good for THINNING and GRAYING hair, as well as SPLIT ENDS. 


Take 8 fresh sage leaves and crush them, then place them in the bottom of small glass bowl. Pour 1/2 cup of boiling water over the sage and leave it sit to steep for 30 minutes, undisturbed. After 30 minutes, strain it and keep the liquid part. Toss the solids, they are not good to reuse. To the sage infusion, add 1 Tablespoon of wheat germ oil, and 1 Tablespoon of grapeseed oil, mix  well and pour into a dark colored bottle. To use, dampen your hair and then massage a small amount of this mixture into your scalp and hair. If you do have split ends, make sure that you rub some of it directly onto the hair ends. Then wrap your hair in a towel or shower cap, and leave it on for 45-60 minutes. When time is up, simply shampoo it out.
___________________________________

DEEP CONDITIONING SCALP PACK Recipe-
This is a mud pack for your hair, without the mud! It is a deep conditioner that is great for all types of hair, but should be used once a month to gain the maximum benefits.


1 Tablespoon of coconut oil
1/8 cup sweet almond oil
1/8 cup aloe vera gel
3 TBS gelatin mix*
2 drops geranium essential oil
3 drops bay or rosemary essential oil


*gelatin mix = take 1 TBS of unflavored gelatin in 2 1/2 Tablespoon of cold water. Stir. Put in microwave to heat water until boiling, then stir again.


Mix all the ingredients together and stir. Put it on towl-dried hair after shampooing. Leave it soak in for 5 to 10 minutes, then wash out. There is no shelf life to this, so mix it just before you want to use it.
___________________________________
CONDITIONING SCALP CLAY TREATMENT Recipe-
This is a deep conditioning and cleansing treatment all in one. The clay will remove residue and dirt, while nourishing the scalp. The coconut oil protects and preserves the hair, as it does the skin, by providing a sealing layer that holds in moisture.


In a small saucepan, over low heat, melt 1/2 cup jojoba oil with 3 TBS of coconut oil. Remove from heat and set aside. In a small bowl, put 4 TBS powdered white clay [make sure you use white clay, as red or green will be too harsh to use on the hair]. Slowly stir in up to 1 cup of distilled water, until a paste is made. Blend the melted oils with paste. Mix thoroughly. Apply a palm full of the clay mixture to damp hair (hair should be clean). Massage into your scalp, then cover the hair with plastic wrap, a turban or a shower cap. Leave on for 15 minutes then shampoo out.
___________________________________
CONDITIONING SCALP TREATMENT for NORMAL HAIR recipe-
This is another once a week treatment. This one is especially good for hair that has been over exposed to wind and sun. The olive oil will improve the hair elasticity, making it stronger and less likely to break. This treatment will leave your hair feeling incredibly soft and smooth. Lavender possesses many healing and nourishing properties, and is known to reduce tension, as well as alleviate headaches. So massaging this into the scalp will have benefits, beyond what it does for your hair!


In a small saucepan, over low heat, heat 1/2 cup of extra virgin olive oil until it is warm. Once warm, remove from heat and add 10 drops of lavender essential oil. Mix well, then massage into the scalp of damp hair. Cover the hair with a turban, plastic wrap, or shower cap. Leave on for 20 before shampooing out.
_____________________________
EASY SHAMPOO RECIPE-
To accommodate every hair type in your family, you can take liquid Castile liquid soap (this is very mild, olive oil soap which is low sudsing) and then add various herbal and/or botanical essential oils to make it appropriate for the different types of hair. Actually, if you cannot find Castile, or if you prefer more a more sudsy shampoo, you can use an uncolored, unscented baby shampoo as the base for the following shampoo recipes. For each one you will use an amount about the size of a quarter. Simply place into the palm of your hand, combine with water to lather, then apply to the hair. Work through your hair, lathering, then rinse and repeat if needed.


The following recipes, using the Castile soap as a base, should last from three to six months. Store them in a plastic bottle after they are mixed.
__________________________________________
NORMAL HAIR HERBAL SHAMPOO Recipe-


This recipe gently cleanses without stripping the hair. The herbs in this recipe will clarify the scalp and hair, and help to add shine. This recipe contains glycerin and white vinegar which will help it to rinse clean, leaving no residue in your hair.


Mix together
1 cup of liquid Castile soap (or your plain baby shampoo)
1 teaspoon glycerin
3 drops rosemary essential oil
3 drops sage essential oil


1 teaspoon white vinegar
_____________________________
DRY OR DAMAGED HAIR SHAMPOO recipe-
This recipe has several enriching herb and oils that are soothing as well as conditioning. This formula will put that silky feeling back into your hair.


Mix together;
1 cup of liquid Castile soap (or the baby shampoo previously described)
1 tsp glycerin
1 tsp aloe vera
1tsp jojoba oil (may substitute apricot kernal oil)
3 drops chamomile essential oil
3 drops lavender essential oil
1 vitamin E capsule (take a 400 unit or more capsule and pirce it with a pin, then place the liquid in the mix)
_________________________________
OILY HAIR SHAMPOO Recipe-
The trick for treating oily hair is to not strip the scalp so much that it signals for more oil to be produced. You want to brace the scalp and slow the oil production without being overly harsh or drying. This recipe should be just what you need!


Mix together-
1 cup liquid Castile (or the baby shampoo previously described)
1 tsp glycerin
1/2 tsp tea tree extract or oil
1/2 tsp nettle extract or oil
1/2 tsp witch hazel
3 drops each of your choice of TWO of the following essential oils; orange, frankincese, grapefruit, lemon, juniper, cypress, borage or lavender
__________________________________________
SHAMPOO for LIGHT COLORED HAIR Recipe-
This shampoo is mild enough for daily use, and is especially formulated for light hair.
Take 1/2 cup fresh (or 1/4 cup dried) chamomile* and crush them in a small glass bowl. Pour 1 1/2 cups of boiling water over the chamomile, cover and allow to steep for 20 minutes. Once time is up, strain and throw away the solids, while reserving the liquid. Stir 3 TBS liquid Castile soap and 1 tsp jojoba oil (may substitute sesame oil if desired) into the chamomile infusion. Stir well, then add 3 drops of patchouli or ylang-ylang essential oil and mix again. Place into a plastic bottle with a pour-top spout.


*you may substitute calendula or lemon peel for the chamomile if desired.
______________________________________
SHAMPOO for DARK COLORED HAIR
This shampoo is mild enough for daily use and is especially formulated for dark colored hair.
Take 1/2 cup fresh (or 1/4 cup dried) rosemary* and crush them in a small glass bowl. Pour 1 1/2 cups of boiling water over the rosemary, cover and allow to steep for 20 minutes. Once time is up, strain and throw away the solids, while reserving the liquid. Stir 3 TBS liquid Castile soap and 1 tsp jojoba oil (may substitute sesame oil if desired) into the chamomile infusion. Stir well, then add 3 drops of patchouli or ylang-ylang essential oil and mix again. Place into a plastic bottle with a pour-top spout.
*you may substitute sage or cloves for the rosemary if you so choose.
___________________________________
DRY SCALP SHAMPOO Recipe-
Tea Tree oil has many healing and soothing properties. It is used to treat everything from viruses to rashes, even burns. On the scalp it works well to sooth dry, flaky skin. Simply mix 2 TBS of the SHAMPOO for LIGHT or DARK hair with 3 drops of tea tree essential oil, instead of the essential oil additive at the end of the recipe(s).


___________________________________________
RINSES. Remember that after shampoo rinses remove all of the soap and residue from the hair, while leaving it extra shiny, and [preparing for the conditioner.


VITALIZING RINSE  Recipe-


Chop two sprigs of fresh rosemary and place it a jar. Fill the jar with 1 cup of apple cider vinegar and cover. Store jar in cool, dark place for 1 week, shaking jar vigorously once each day. After one week, strain, retain the liquid and throw out the plant material. Return the liquid to the jar. When you are ready to use, dilute 1/3 cup of the liquid in 3 cups of warm water. Rub into freshly washed, damp hair and scalp. Rinse thoroughly and dry as usual. *Avoid getting this mixture into your eyes!*
________________________________________


AFTER SHAMPOO RINSE for DANDRUFF Recipe-
1/4 cup apple cider vinegar
4 cups water
1 cup thyme infusion [infusion is made by steeping 1 tsp of fresh thyme in hot water for 5 min., covered]


Mix all together and use about half, depending upon the length of your hair, as a rinse after shampooing. Store in a dark glass bottle in a cool, dark place. This will remain good for about one week only.


In this recipe the vinegar works as a mild astringent, and the thyme as a toner. Dandruff is a common scalp condition that occurs when the dead skin is shed. It is often referred to as seborrhea, which is an inflammatory skin disease caused by a problem with the sebaceous (oil secreting) glands. It is often recommended that you increase your B complex vitamins, along with trying a topical treatment such as this rinse.
____________________________________________
SWEET HAIR WRAP Recipe-
To add shine and moisture to your hair, Take 1/2 cup of honey, molasses or maple syrup and massage it into your damp hair and scalp. Then cover with a turban, shower cap or plastic wrap. Leave in for 30 minutes, then rinse with warm water and shampoo out.